


We are moving all Atari Lynx related content over to Atari Lynx Vault and all our shop content over to K-Retro Gaming. Please update your bookmarks!
As a result of this change, the following will no longer be available: Online Lynx Emulator, Collection Tracker, Game Ratings, News. If you are interested in contributing content to Atari Lynx Vault, we are seeking editors and maintainers.
Why is this happening? First - the Atari Gamer branding is changing to K-Retro Gaming to allow us to expand to providing games, replacement parts, and mod services to other game consoles. And second - The content management system running Atari Gamer is out of date and Google AppEngine (where the website runs) will no longer allow it to run after the 30th January 2024, so in order to preserve all content we switched to a new and modern content management system and chose a website domain that better suits the subject matter. Since we are operating this website in our spare time, on top of full time family and job committments, some features had to be dropped.
I've bought a few Atari Lynx consoles recently in various states repair, some completely non functional, some with a bad screen and hardly any sound. I was intending to mod one of my Lynxes with McWill's LCD screen kit for a while so I decided to pick a console that was in the worst shape but still working. This Lynx II had black lines across the screen, a cracked screen cover and crackling sound. It was definitely a fixer upper - perfect for this mini project!
- Part 1 - introduction and case disassembly
- Part 2 - re-capping the motherboard
- Part 3 - broken speaker replacement
- Part 4 - screen cover replacement
- Part 5 - McWill LCD screen mod installation
This is what the screen was looking like. There were these odd black lines across the screen. The brightness worked well, but the colours were not very vibrant.

Sound was even worse. Here's a video of the theme tune from Rampage playing (you may need to turn up your speakers to hear it)...
Crackle, hiss, crackle, crackle! Very quiet too.
So before I could do anything, I had to take the Lynx apart. The first step was to peel off the rubber grips. These were held pretty firmly with some glue. Once they were off, I put them aside into a drawer to keep them dust free so I could stick them back on when when the whole mod was finished.

With the grips off I could then remove four screws that hold the case together.

Prying the case apart I discovered that the motherboard was not secured by any other screws inside. The battery compartment was still in the way though, held on by a single screw.


Behind the battery compartment were some ribbon cables, I decided to disconnect those a bit later. First, I spun the console 180 degrees around and lifted the motherboard up from the front side.


Here I could disconnect the backlight and speaker cables. These were the easy ones.

To disconnect those ribbon cables I had to release the locks on their sockets first. This was done by pulling the topmost notches away from the board. Once those were lifted as per the picture below, the ribbon cables came out easily.


The motherboard was now free!
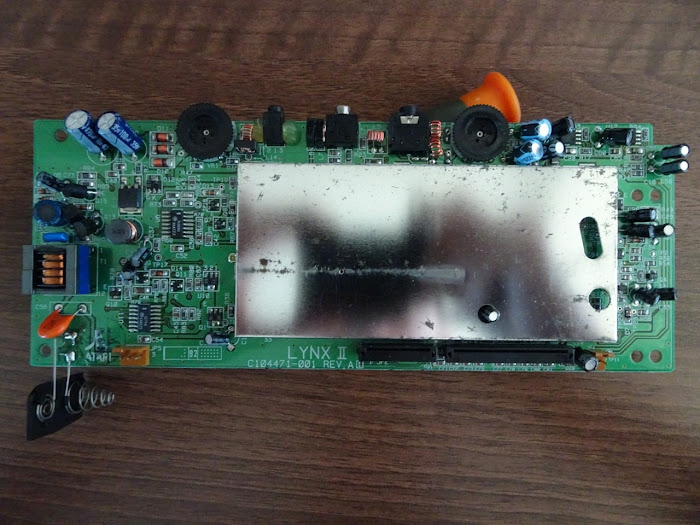
The next step was to replace all of the electrolytic capacitors on the motherboard. There were plenty of kits available on eBay, but I decided to put together my own from a Lynx Capacitor Picking List. This was cheaper for me since I was buying enough capacitors to do multiple Lynx consoles. I got all my caps from RS online.
- Part 1 - introduction and case disassembly
- Part 2 - re-capping the motherboard
- Part 3 - broken speaker replacement
- Part 4 - screen cover replacement
- Part 5 - McWill LCD screen mod installation
This article has been reproduced here with permission from Igor's Blog.
-AGIf your download doesn't start automatically after 10 seconds, please click here.