


We are moving all Atari Lynx related content over to Atari Lynx Vault and all our shop content over to K-Retro Gaming. Please update your bookmarks!
As a result of this change, the following will no longer be available: Online Lynx Emulator, Collection Tracker, Game Ratings, News. If you are interested in contributing content to Atari Lynx Vault, we are seeking editors and maintainers.
Why is this happening? First - the Atari Gamer branding is changing to K-Retro Gaming to allow us to expand to providing games, replacement parts, and mod services to other game consoles. And second - The content management system running Atari Gamer is out of date and Google AppEngine (where the website runs) will no longer allow it to run after the 30th January 2024, so in order to preserve all content we switched to a new and modern content management system and chose a website domain that better suits the subject matter. Since we are operating this website in our spare time, on top of full time family and job committments, some features had to be dropped.
I recently started collecting Atari Lynx Lapel Pins and quickly found that I needed a way of displaying them. I've looked around eBay for jewellery stands and similar display stands and either didn't like their look or thought they were way too overpriced. After telling my dad about what I wanted to do, he gave me a simple and practical solution - use a photo frame!
This was the end result...Yes I need more pins to fill out, but it ticks all the boxes. The stand is minimal, has enough room to fit all of the pins and doesn't cost much.

So lets see how I put it together!
I used a standard sized photo frame - 21cm x 29.7cm. As usual it had a thin glass front, which was easy to remove since it was held in by being sandwiched between the inner frame and the back. This piece of glass had to be removed since it would get in the way of mounting the pins.


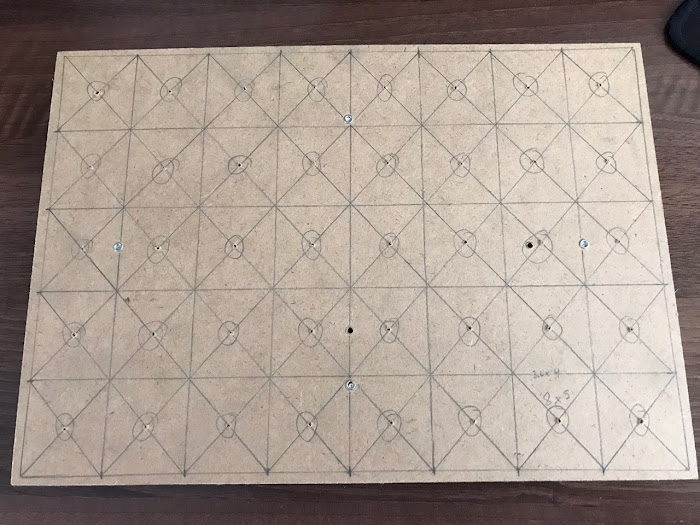
After removing the glass, I put the backing section into the frame and traced out the available space. Based on what area was left to play with, I worked out that I could have an 8 x 5 grid of cells each measuring 3.6cm x 4cm. This would give me 40 cells, which was more than enough. I tried placing some pins within various cells and the sizing worked well!


Next I worked out the centre points of each cell by drawing diagonal lines from corner to corner and then drilled straight through the backing using a 1mm drill bit. This drill bit was a little too big for the pins, unfortunately it was the only one I had. It would have been nicer to have a tighter fit but this worked still. The pins still stayed in place due to the fabric locking them in so having a larger hole was not a problem.
To cover the backing and give the stand a nicer look I used some black stretch fabric that I had laying around. I simply stretched it over the inner part of the backing and put the frame back together, locking the backing in place. No glue! After some adjustments the fabric was flat and even throughout.
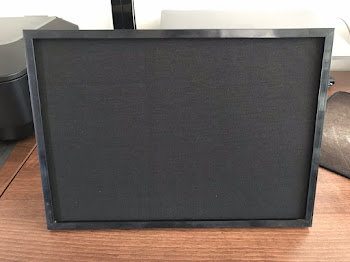

All that was left then was to trim off the excess fabric and fit the pins!

I think this stand turned out rather nice. I didn't have to buy anything extra since I had all of the materials at home already, but everything that was used would be easily obtainable and the whole project could be started and completed within half an hour. Enjoy!
If your download doesn't start automatically after 10 seconds, please click here.